|
Spring Holiday Village This project is another in our Tribute to Tinplate(tm)" series, a tribute to the tinplate villages that were served by tinplate trains in the early 1900s.
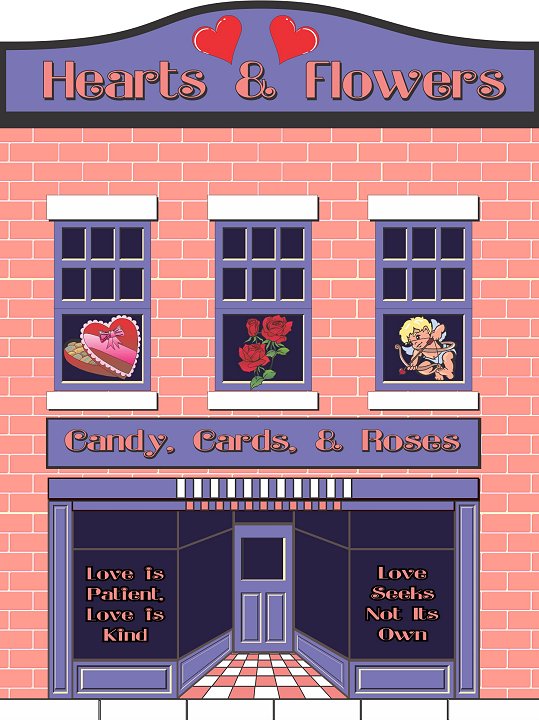
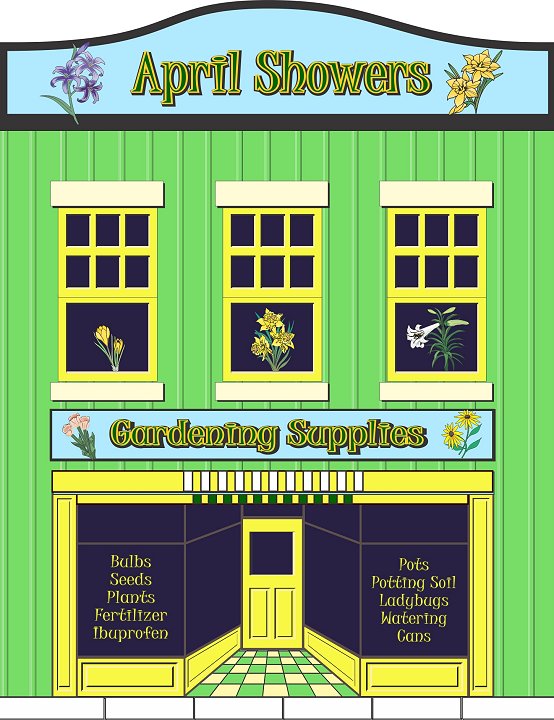
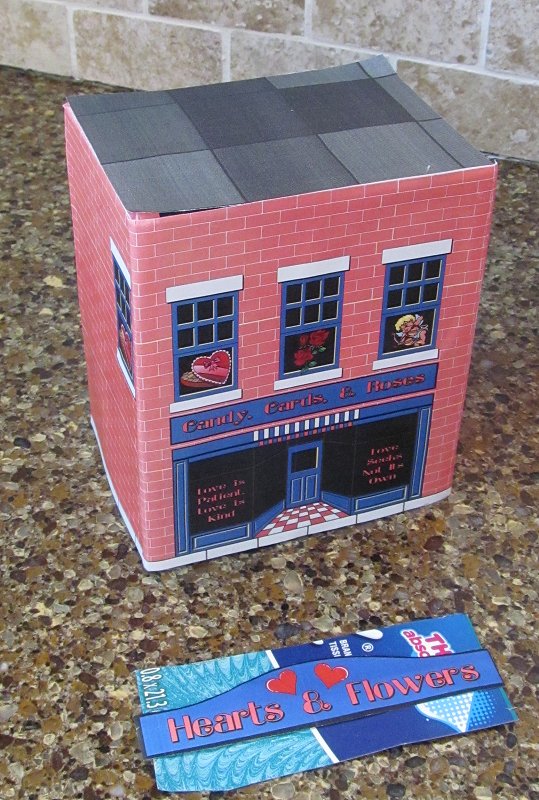
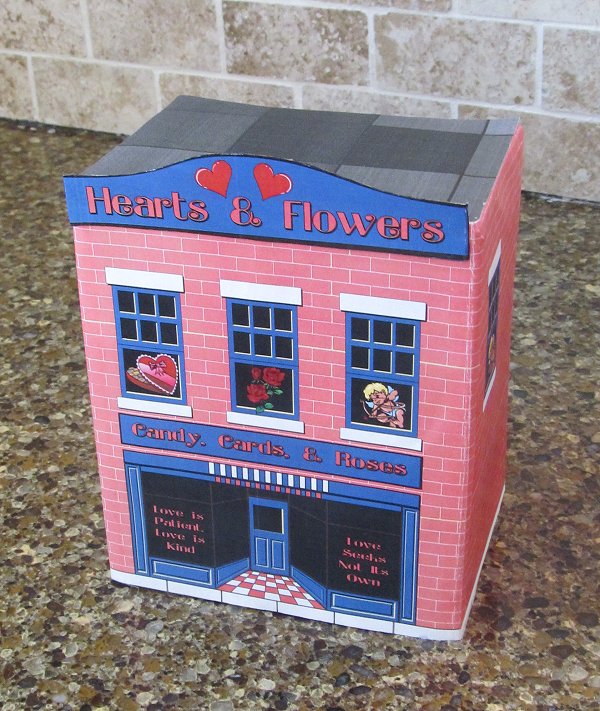
Like the original Building Tinplate Storefronts project, this project was inspired by a series of candy containers that were made in the early-to-mid 1900s by West Brothers.  To create the lithographic-style graphics, I worked from photographs of the originals as much as possible to reproduce the architectural details and the fake 3-D entrances. I also increased the size of the buildings, to look right with Christmas villages and O and On30 trains. I also added a few extra details to keep the buildings from looking too plain at the larger sizes. To create the lithographic-style graphics, I worked from photographs of the originals as much as possible to reproduce the architectural details and the fake 3-D entrances. I also increased the size of the buildings, to look right with Christmas villages and O and On30 trains. I also added a few extra details to keep the buildings from looking too plain at the larger sizes.
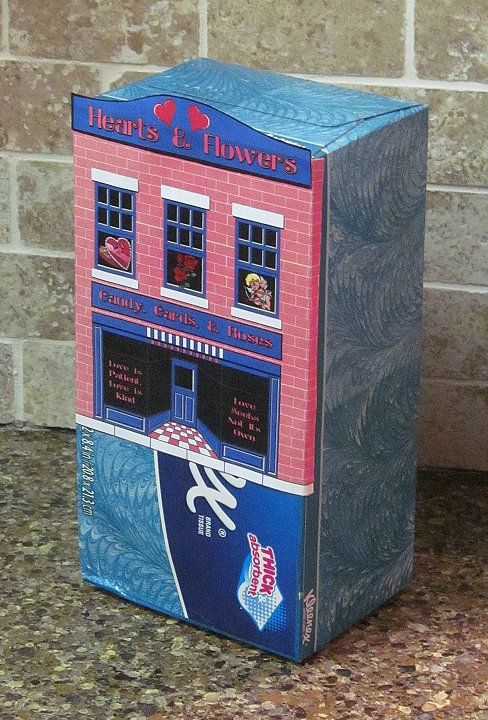
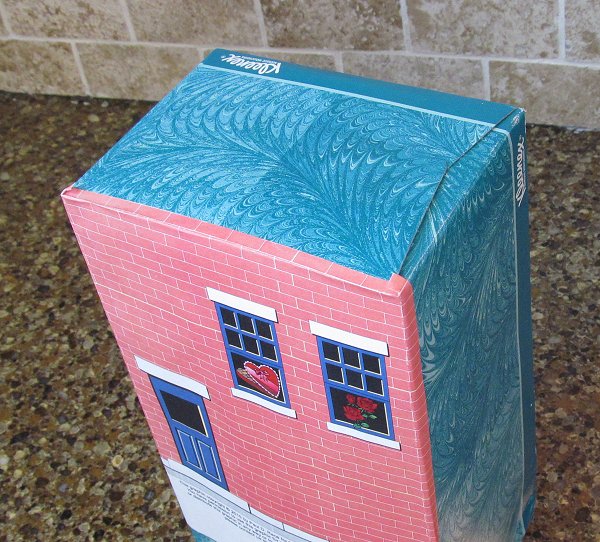
Update for 2015 - Howard and Paul have been pleased to learn about other folks building these great projects. However, a lot of folks who like the idea of these buildings seem a bit put off by the idea of putting a fresh blade in the Xacto knife and making their own structures from flat cardboard.  So we have designed this set of buildings only to use a box that comes into many North American homes every winter and spring - sometimes in bulk. In other words, the graphics for the walls of these structures fit perfectly on standard 160-tissue Kleenex(r) boxes. You only get one building per box, because you need to use some of the spare cardboard for the crest of the building and to reinforce the hole in the back. But if your family's like my family most winters, running out of Kleenex boxes is the least of your problems. So we have designed this set of buildings only to use a box that comes into many North American homes every winter and spring - sometimes in bulk. In other words, the graphics for the walls of these structures fit perfectly on standard 160-tissue Kleenex(r) boxes. You only get one building per box, because you need to use some of the spare cardboard for the crest of the building and to reinforce the hole in the back. But if your family's like my family most winters, running out of Kleenex boxes is the least of your problems.
If you sign up for our Trains-N-Towns(tm) newsletter, we'll let you know when we create and upload more storefronts or other projects you might find helpful.
What You Will Need
- Clean, empty Kleenex boxes, the kind that carry 160 double tissues.
- Thick, clean cardboard or foam core for the base
- Corrogated cardboard or foam core board for the foundation
- A sharp mat knife or Xacto knife
- Elmer's white Glue-All or similar white craft glue that dries clear. A glue stick would also come in handy.
- Several sheets of acid-free white bond paper
- Light card stock for printing the graphics (optional)
- Gray paint for the base
- Acrylic paint or markers for the exposed edges of the cardboard
- Access to the Internet and a color printer.
- Clear glossy acrylic finish to help give a metallic appearance and protect the graphics when you are finished.
For a more comprehensive list of tools and supplies that come in handy on any cardboard house project, please refer to our article What You Need to Build Glitterhouses.
A Note about Scale
Although Howard's Marx trains run on O gauge tracks, they are closer to S scale (1:64), the scale of S gauge American Flyer trains, and many collectible village houses. So we tend to publish buildings in S Scale first. These building will be slightly fatter and deeper than the other sets we've presented so far, but door heights and overall height are about the same. If you need a scale other than S, get in touch with Paul and he'll try to help you out. (However, if Paul rescales them, they won't fit on a Kleenex box.)
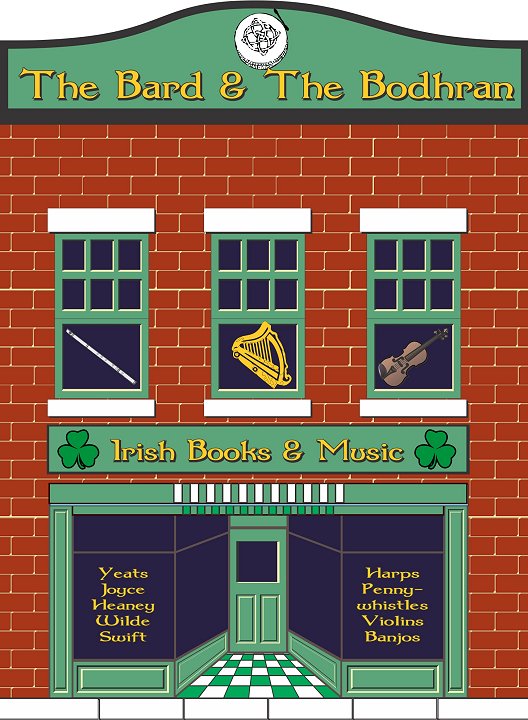
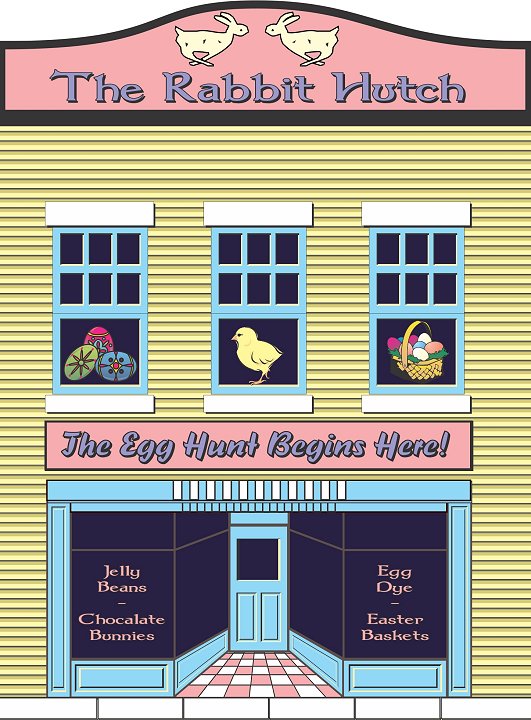
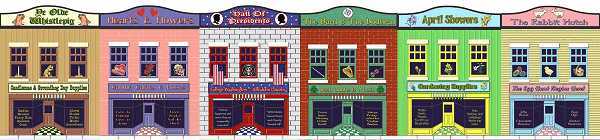
Store Front Graphics
To help you decide which building to start with, I've supplied medium-resolution jpeg versions of the building faces. If you click on a thumbnail in the table below, you'll see a version big enough to see clearly. However for the actual project, please download the zip files from the text boxes below the thumbnails. Each file includes all four sides of the building in pdf format. Each zip file also includes a sheet that represents a "tar paper" roof.
It's easiest if you download the files to your hard drive, and open them there. Print these patterns on acid-free paper or card stock, using your color printer. Again, be certain that they print at 100% - so "shrink to fit" or "expand to fit" are not checked.
By the way, some printers will print these darker or lighter than they appear on this page. My color laser prints them much darker. But they are still charming. And this way, if they fade, they'll still look good.
If you can't get the graphics to work the way you need them to, contact
Paul and ask him for help - that's his department. :-)
A note about Copyright - However you use these plans and graphics for your personal use, please keep in mind that the lithograph-style graphics are copyright 2015 by Paul Race and are not to be copied, re-used, republished, or repurposed without prior permission and appropriate credit. Commercial use without prior permission is illegal and expressly forbidden.
Big Indoor Trains(tm) is a participant in the Amazon Services LLC Associates Program, an affiliate advertising program designed to provide a means for sites to earn advertising fees by advertising and linking to amazon.com. Paul likes making resources like this available to hobbyists, but they are expensive and time-consuming to produce and publish, and it's frustrating to see other folks profiteering off his hard work. In other words, if you like having this kind of resource available and you'd like to see more, please respect the creators' rights.
Building the Base
 For buildings like this one, Howard often makes the "sidewalk" in front of the building into a "boardwalk." This will eventually give you a very nice place to set figures, fire hydrants, lamp posts, and the like. For buildings like this one, Howard often makes the "sidewalk" in front of the building into a "boardwalk." This will eventually give you a very nice place to set figures, fire hydrants, lamp posts, and the like.
Howard often makes the base by laminating two pieces of the thin corrugated cardboard from Express Mail packages. You could laminate "matte" cardboard as well.
The "foundation" is a rectangle that gives you more gluing surface for gluing the building down. To get the size, simply trace around one end of the Kleenex box and cut your piece about 1/8" smaller in both directions. The foundation should fit loosely inside the open end of the Kleenex box once it's been cut apart.
Applying the Graphics
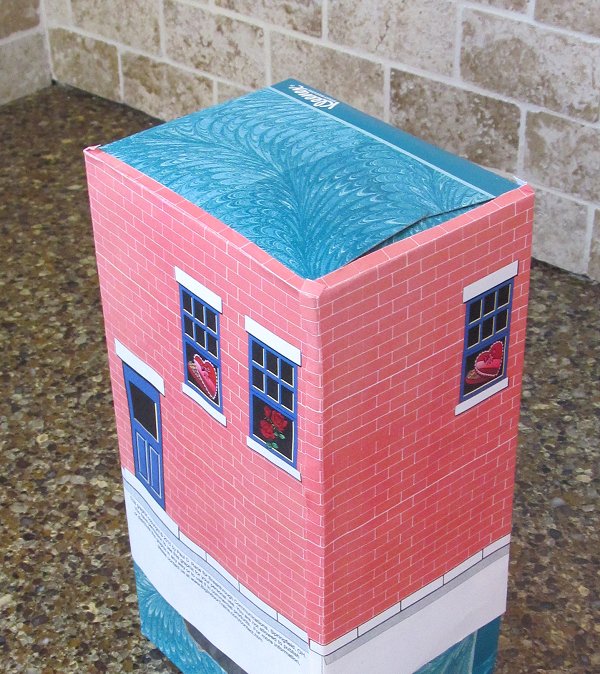
Then I carefully applied the graphic wraps to one wall at a time.
Note: For the following illustrations, I made a "mockup," taking some shortcuts I wouldn't recommend if you want a permanent addition to your village. For one thing, I used a Kleenex box that was intact, just to give you the idea of how the mundane recyclable turns into a charming little project as it progresses. I seriously recommend you cut the box first, and glue a bit of cardboard across the hole in the back to make it more stable. That way when you start gluing the graphics on, you can wrap the little gray tab around the lower part of the building to give it more definition.
When you measure the building for cutting, take into account that you will be wrapping a bit of the graphic over the top corner. (For the stone building, I would wrap one course of stone. For the brick building, I would wrap one row of bricks. For the clapboard buildings, I would measure out 1/4" and so on.)
 On this building, I started on the back, then did the sides and the front. I could have started with the sides just as easily, but the front definitely has to come last. On this building, I started on the back, then did the sides and the front. I could have started with the sides just as easily, but the front definitely has to come last.
I creased each graphic along the fold lines, then cut it out. Howard ordinarily creases only one of the fold lines first, in case there's a discrepancy between the graphic file and the actual printout. However, I had already tested the measurements of my printout against the box I was going to use.
On this building, I overlapped the top edge by one row of bricks, nipping the corner so I could fold it down flat, too. This way, I didn't have to worry about any of the Kleenex box pattern peaking through once I glued the roof on.
When you do this, spread a thin layer of white glue (like Elmer's) over the entire wall to be glued, and along the edges where the extra bits will wrap around the corner. Then fasten the graphic down carefully. For these illustrations, I used a fairly expensive glue stick, and the results were not encouraging - the sides of the Kleenex box are too shiny for the gluestick to really take hold. So I recommend liquid glue. In addition, liquid glue will give you a tiny bit more time to get things lined up exactly. 
Consider using clothespins or the like to make certain the wrap doesn't shift during the drying process.
Once the first "wall" has dried, you add the next wall. Ordinarily, one of your "fold lines" on the next wall should actually be a "cut line." however, in this case, I wrapped the next graphic a little, and I thought that worked, too.
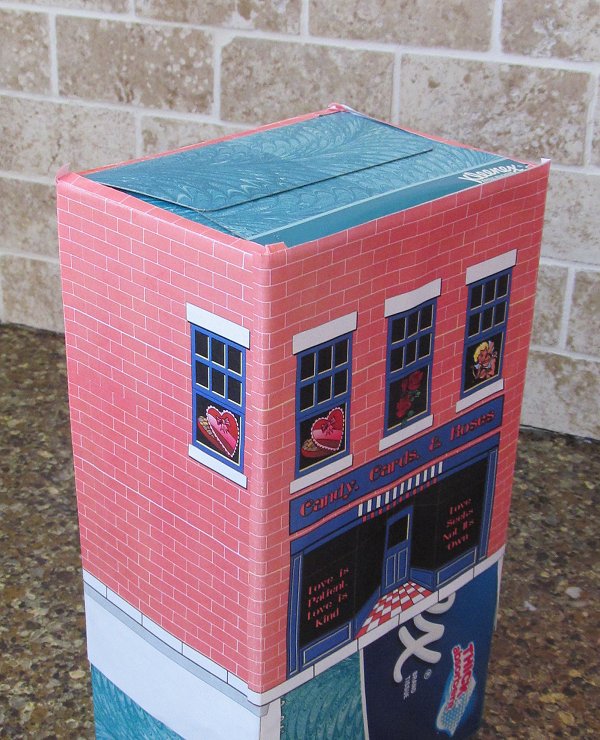
 The next photo shows the front attached. Again, I wrapped front around instead of nipping it right there, and I think it looks okay. You may also prefer to cut the front exactly, as Howard does. The next photo shows the front attached. Again, I wrapped front around instead of nipping it right there, and I think it looks okay. You may also prefer to cut the front exactly, as Howard does.
Finally I cut the rest of the cardboard off the building - something I'll do first next time. I traced around the end of the building to measure the roof, cut it out, trimmed it more precisely, then glued it on.  I also glued the crest to a scrap piece of cardboard. I also glued the crest to a scrap piece of cardboard.
After the glue under the crest dried, I cut it out carefully, then used a black magic marker to touch up the edges of the cardboard. Finally I glued the crest on the front. I glued it fairly low so it wouldn't be sticking out so far that it gets bumped all the time. Alternatively, if you want to glue the crest on a little higher, you can another piece of cardboard to the part of the crest that will be sticking out.
All that remains now is the bass and foundation. 
Touch Up the Cut Lines
When all the graphics are applied, take a marker or fine-tipped brush and touch up the edges of the cut graphic media with a color that is compatible with the siding color.
Assemble the Structure
Once you have tested all of the fits, it's time to glue your structure(s) together. Double-check the fit of the foundation inside each building, then glue it onto the base. I'd give it a few minutes to set before gluing the building down on top of it. Again, the hurry-up-and-wait aspect of this stage of the project is reduced if you are working on two or three buildings at once.
Finish
Wait until the graphics, paint, and glue are thoroughly dry (at least overnight, if not 48 hours), then spray the structure(s) with several light coats of a clear glossy indoor/outdoor acrylic finish. This protects the surfaces from moisture and dust and also helps reduce fading. In addition, it makes the lithography pattern "pop." Do not spray such a heavy coat in one pass that you cause any streaks, runs, or drips, though, or you'll have to start all over.
Of course the structures will really come to life when you add accessories and put them into some sort of setting, even a simple one. Our article  Add Spring Color to Your Holiday Village or Indoor Railroad provides some ideas for using scrounged weeds and leftover paint to provide a bright spring setting for your houses. Add Spring Color to Your Holiday Village or Indoor Railroad provides some ideas for using scrounged weeds and leftover paint to provide a bright spring setting for your houses.
Conclusion
If you like this project, stay in touch - more are on the way. In the meantime, you might like to take a look at the following projects. You'll notice that we have the year pretty well "covered" with holiday storefronts, so if you wanted to leave a village up year-round and just swap structures in and out, you can. The other storefronts do require a little more work, but hopefully once you've seen how rewarding they are to build, you'll keep going.
 Building TinPlate-Syle Store Fronts -
If this project looks familiar, it's because it was our first project based on the West Brothers tinplate candy boxes from the early 1900. They saved money by using one plan with multiple sets of graphics to get maximum use out of their pattern expense. Lots of these eventually found their way to Christmas villages and early "model" railroads over the years. This project is inspired by three of the West Brother's most popular buildings. Building TinPlate-Syle Store Fronts -
If this project looks familiar, it's because it was our first project based on the West Brothers tinplate candy boxes from the early 1900. They saved money by using one plan with multiple sets of graphics to get maximum use out of their pattern expense. Lots of these eventually found their way to Christmas villages and early "model" railroads over the years. This project is inspired by three of the West Brother's most popular buildings.
 Christmas-Themed Storefronts - If you set up tinplate trains at Christmas, here's a dandy way to expand your railroad setting without breaking the bank. Cardboard, glue, a color printer, and acid-free bond paper are all you need. This article also links to several other tinplate-inspired Christmas-themed structures you can use to make your whole display explode with vintage-looking holiday cheer. Christmas-Themed Storefronts - If you set up tinplate trains at Christmas, here's a dandy way to expand your railroad setting without breaking the bank. Cardboard, glue, a color printer, and acid-free bond paper are all you need. This article also links to several other tinplate-inspired Christmas-themed structures you can use to make your whole display explode with vintage-looking holiday cheer.
 Seaside Storefronts - Take a spring break without ever leaving your workshop. Paul's newest storefronts were inspired by a trip to Nag's Head last October, plus memories of earlier trips to seaside villages in Florida, Connecticut, and Maine. Sticking with the West Brothers outline, Paul has replaced the brick and stone with clapboard painted in the colors and themes that brighten coastal towns on both coasts. Colors are compatible with Howard Lamey's Sandy Shores beach-inspired collection. In 2013, we added another building, Daffy's Taffy, to this collection. Click on the picture to go to this collection. Seaside Storefronts - Take a spring break without ever leaving your workshop. Paul's newest storefronts were inspired by a trip to Nag's Head last October, plus memories of earlier trips to seaside villages in Florida, Connecticut, and Maine. Sticking with the West Brothers outline, Paul has replaced the brick and stone with clapboard painted in the colors and themes that brighten coastal towns on both coasts. Colors are compatible with Howard Lamey's Sandy Shores beach-inspired collection. In 2013, we added another building, Daffy's Taffy, to this collection. Click on the picture to go to this collection.
 Patriotic Storefronts Soon after we released the other storefronts, we learned that a friend of ours sets up patriotic scenes on his railroad for Memorial Day, Flag Day, Independence Day, and Veterans' Day. So we added three buildings with early-American colors and lettering and patriotic themes. Patriotic Storefronts Soon after we released the other storefronts, we learned that a friend of ours sets up patriotic scenes on his railroad for Memorial Day, Flag Day, Independence Day, and Veterans' Day. So we added three buildings with early-American colors and lettering and patriotic themes.
Note: If you build the Hall of Presidents building above, you can either add these to your village on President's day, or add the Hall of Presidents building to this village when you want to celebrate other patriotic holidays.
Click on the picture to go to this collection.
 Halloween StorefrontsSince we posted Howard Lamey's Spook Hill series of Halloween-inspired "putz" house project, we've met a lot of folks who set up elaborate Halloween villages, or who leave their "holiday villages" up year-round. So Paul has developed graphics for folks who want to add a late October touch to their O gauge railroad or holiday village. Click on the picture to go to this collection. Halloween StorefrontsSince we posted Howard Lamey's Spook Hill series of Halloween-inspired "putz" house project, we've met a lot of folks who set up elaborate Halloween villages, or who leave their "holiday villages" up year-round. So Paul has developed graphics for folks who want to add a late October touch to their O gauge railroad or holiday village. Click on the picture to go to this collection.
 Building a Vintage "Lithograph" Station
Our first "Tribute to Tinplate" article pays tribute to the lithographed stations of a century ago. Free downloadable commercial-grade graphics and instructions are available in several scales. The classic colors go well with Christmas settings as well as traditional O gauge or S gauge train sets. Building a Vintage "Lithograph" Station
Our first "Tribute to Tinplate" article pays tribute to the lithographed stations of a century ago. Free downloadable commercial-grade graphics and instructions are available in several scales. The classic colors go well with Christmas settings as well as traditional O gauge or S gauge train sets.
 Building a Vintage Tin-Style CottageThis project was originally inspired by a popular pre-war tinplate house that was made to go with Lionel trains. Click on the photo to see our free downloadable, commercial-quality graphics and instructions, as well as Howard Lamey's plans and assembly details. Building a Vintage Tin-Style CottageThis project was originally inspired by a popular pre-war tinplate house that was made to go with Lionel trains. Click on the photo to see our free downloadable, commercial-quality graphics and instructions, as well as Howard Lamey's plans and assembly details. This version actually looks pretty nice with the Spring Holiday structures above. But mMany other options are available as well, including a Halloween option.
 Tinplate Diner Project with Christmas Graphics - We've also added a special set of Christmas-themed graphics to Howard Lamey's tinplate-inspired diner project. Halloween and and year-round graphics are also provided, but we're showing the Christmas graphics to get you excited about your December crafting possibilities. As always, plans and graphics are free downloads. Tinplate Diner Project with Christmas Graphics - We've also added a special set of Christmas-themed graphics to Howard Lamey's tinplate-inspired diner project. Halloween and and year-round graphics are also provided, but we're showing the Christmas graphics to get you excited about your December crafting possibilities. As always, plans and graphics are free downloads.
New for 2015 - A version you can easily build from Nestles coco containers has been added here
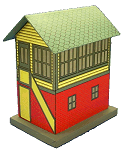 Building a Lithograph-Style Switch Tower
Every big railroad "yard" had one of these "control towers" that let railroad men watch and operate the switches so trains could be built up, cars could be sorted out, and everyone went where they were supposed to. This "Tribute To Tinplate" with graphics by Paul and assembly tips by Howard Lamey is easy, inexpensive, and impressive. We've added it here because the original Hornby antique this project was based on was already in Christmas colors, and so is our tribute. Includes free plans, instructions, and vintage-inspired graphics.
Building a Lithograph-Style Switch Tower
Every big railroad "yard" had one of these "control towers" that let railroad men watch and operate the switches so trains could be built up, cars could be sorted out, and everyone went where they were supposed to. This "Tribute To Tinplate" with graphics by Paul and assembly tips by Howard Lamey is easy, inexpensive, and impressive. We've added it here because the original Hornby antique this project was based on was already in Christmas colors, and so is our tribute. Includes free plans, instructions, and vintage-inspired graphics.
 Christmas Building Textures - For designing your own Christmas railroad or village buildings, we've provided a special set of free downloadable roof and wall patterns based on century-old tinplate bulding graphics but reimagined in Christmas colors. There's no limit now to how many tinplate-inspired Christmas-themed structures you can add to your holiday village or railroad. Matching doors and windows are provided in the Tinplate Textures link below. Christmas Building Textures - For designing your own Christmas railroad or village buildings, we've provided a special set of free downloadable roof and wall patterns based on century-old tinplate bulding graphics but reimagined in Christmas colors. There's no limit now to how many tinplate-inspired Christmas-themed structures you can add to your holiday village or railroad. Matching doors and windows are provided in the Tinplate Textures link below.
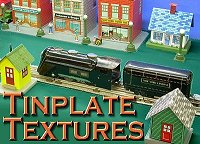 Tinplate Textures - For even more free downloadable options, this section includes door and window patterns, as well as additional brick, shingle, and siding patterns inspired by the tinplate buildings that Lionel and other companies made to go with their toy trains a century ago. Tinplate Textures - For even more free downloadable options, this section includes door and window patterns, as well as additional brick, shingle, and siding patterns inspired by the tinplate buildings that Lionel and other companies made to go with their toy trains a century ago.
The Tinplate Textures page provides most patterns in three different scales to help you find the best sizes for your existing railroad or holiday village.
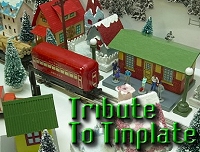 New Feature! - "Tribute to Tinplate" Articles
Here's a popular series of projects that pay "Tribute to Tinplate," based on the tinplated-steel trains and towns of a century ago. Free downloadable commercial-grade graphics and instructions will help you inexpensively add an authentic vintage look to any indoor railroad. Most projects have multiple pre-scaled plans and graphics, plus scalable graphics for the smaller scales, so you can easily add a vintage look to ANY railroad or holiday village, no matter what size your trains and towns are. Several of the most popular projects are shown further down in this list. New Feature! - "Tribute to Tinplate" Articles
Here's a popular series of projects that pay "Tribute to Tinplate," based on the tinplated-steel trains and towns of a century ago. Free downloadable commercial-grade graphics and instructions will help you inexpensively add an authentic vintage look to any indoor railroad. Most projects have multiple pre-scaled plans and graphics, plus scalable graphics for the smaller scales, so you can easily add a vintage look to ANY railroad or holiday village, no matter what size your trains and towns are. Several of the most popular projects are shown further down in this list.
- What is a Glitterhouse? -
  Remember when Christmas Villages were made of cardboard instead of china and resin? Get a head start on celebrating the original Christmas village tradition! Articles on collecting and building authentic, vintage-style pasteboard houses, just like the ones we had growing up. Sure, they're not scale, but they are lots of fun! This section includes several articles on building glitterhouses and typical accessories, including the one below Remember when Christmas Villages were made of cardboard instead of china and resin? Get a head start on celebrating the original Christmas village tradition! Articles on collecting and building authentic, vintage-style pasteboard houses, just like the ones we had growing up. Sure, they're not scale, but they are lots of fun! This section includes several articles on building glitterhouses and typical accessories, including the one below
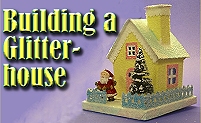 Building a Glitterhouse - A detailed primer on building your own vintage-style cardboard Christmas house, includes bonus "church conversion" plans for making the same core structure into a small church. Includes free downloadable plans and directions. Building a Glitterhouse - A detailed primer on building your own vintage-style cardboard Christmas house, includes bonus "church conversion" plans for making the same core structure into a small church. Includes free downloadable plans and directions.
- Building the Union Station - This original project by designer Howard
 Lamey is inspired by two traditions - the cardboard Christmas houses that were popular in US homes between 1928 and 1965 and the Lionel station that was popular for most of the 20th century. New, October, 2008! Lamey is inspired by two traditions - the cardboard Christmas houses that were popular in US homes between 1928 and 1965 and the Lionel station that was popular for most of the 20th century. New, October, 2008!
 Building a Tinplate-Inspired Lamp Post The ideal accessory for the Lewis Park Station, or any station or city hall on your railroad or holiday village. No, they don't actually light, but they are cheap and easy to build and add a great deal of vintage interest to any setting. Free downloadable plans are available in several scales. Building a Tinplate-Inspired Lamp Post The ideal accessory for the Lewis Park Station, or any station or city hall on your railroad or holiday village. No, they don't actually light, but they are cheap and easy to build and add a great deal of vintage interest to any setting. Free downloadable plans are available in several scales.
 Building a Tinplate-Inspired Railroad Crossing Sign This is the ideal accessory for the Watchman's Shanty project. Based on a series of products that are now available only as expensive collector's items, this easy and almost-free project will add texture, interest, and period to any model railroad or holiday village. Building a Tinplate-Inspired Railroad Crossing Sign This is the ideal accessory for the Watchman's Shanty project. Based on a series of products that are now available only as expensive collector's items, this easy and almost-free project will add texture, interest, and period to any model railroad or holiday village.
- Build a Vintage-Style Barn and Silo - This
 building project uses downloadable graphics to put realistic shingles and siding on an old barn and silo. Readers have built this to work both with Christmas and Halloween villages. building project uses downloadable graphics to put realistic shingles and siding on an old barn and silo. Readers have built this to work both with Christmas and Halloween villages.
Other Articles about cardboard houses include:
To Return to the BIG Indoor Trains(tm) Primer Page, click here.
|


|


 For buildings like this one, Howard often makes the "sidewalk" in front of the building into a "boardwalk." This will eventually give you a very nice place to set figures, fire hydrants, lamp posts, and the like.