I've about wrapped up the latest project, an experiment of sorts to see if it's possible to use cardboard and paper to make something that looks like prewar tin. Using the two-foot rule, it looks pretty good, but a close examination reveals numerous issues...so don't look too close

I started off with USPS corrugated, cut to shape and built up in layers for depth:

After cutting out the door/windows/openings, I used some embossers I found at Michael's to scribe some stonework onto the face of the corrugated. I did this for all four sides, then gave them a thin overspray of some gray primer:
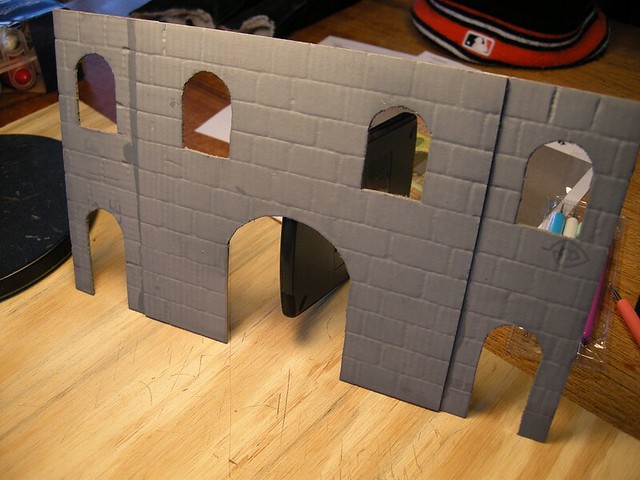
After the primer dried, I gave each side a couple of coats of gloss enamel. I had a bit of a problem with crazing on the second coat, and places where I punctured the paper with the embossers didn't fill very nicely (I was counting on some capillary action that didn't happen):
My inclination was to remake sides where I punctured the paper, but then I decided not to, figuring the deeper marks simply added to the texture, and some of it was covered by signage or the striping (automotive detailing tape). I pressed on, completing the four sides and two interior walls for the tunnel bit:

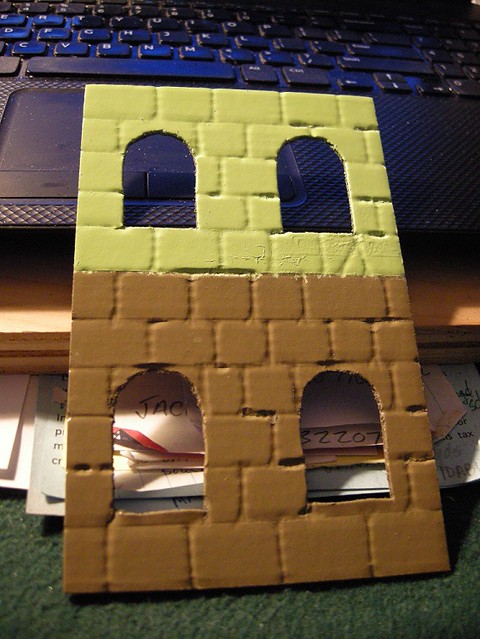
The Marklin station I used for inspiration had no interior walls for the tunnel/atrium, but I went ahead and made a pair thinking it would add to the finished appearance. Here I added entrances for a book stall and a parcel office to go with the ticket and telegraph offices on the front. For the book stall, I scanned a bit of lithography I have from a Hornby station, and pasted that in to the window opening. Being on the interior wall, no one will likely see it, but I'm hopeful it might illuminate when I add the interior lights.
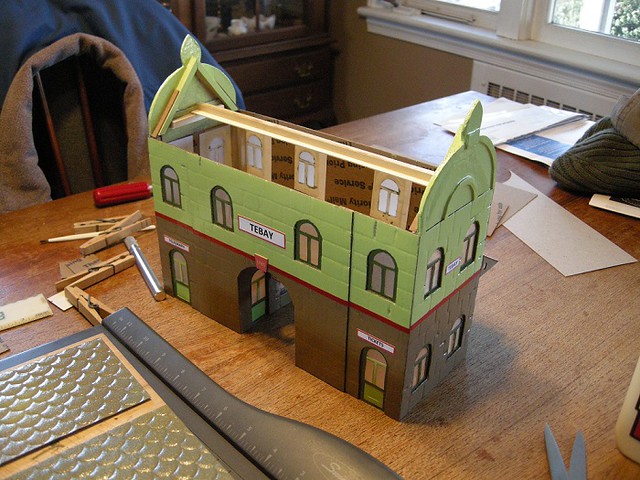
Window and door frames I cut from cardstock and painted using some good quality craft paint. I used some sheets of acetate for window glazing, shot with clear matte on one side to give it a frosted appearance. The frames and glazing I cemented into place using Loctite GO2 glue, a personal favorite. Once this was done, I made a base structure for the platform roof, then assembled the bottom half of the structure using basswood and a few pieces of corrugated to square it up, one of which formed the ceiling of the tunnel/atrium bit:

Next I made a pair of gable-ends for a lift-off roof, held together with more basswood/matt-board stringers. The gables were built up using corrugated and a bit of matt-board, then painted using more of the gloss spray-paint. I screwed in a single E10 cleat-socket that I'll wire up later, hoping it provides enough light for the interior:
I made a couple of roof panels using some cereal box card-board and a piece of embossed paper purchased at Michael's that looked a bit like scalloped shingles (seen in the picture above lying on the paper cutter). The embossed paper had some sort of glitter applied to it; I lightly sanded this to remove as much as possible, than gave it a mottled paint job using gray paint, along with a dusting of the green and brown from the sides, all topped with an overspray of clear gloss.
For the platform roof, I made a rudimentary structure which I covered with one-sided corrugated I got from my good friend Howard Lamey. This stuff is brilliant, replicating the look of corrugated roofing perfectly. I gave that a shot of "steel" paint, washed it with some diluted black acrylic, a shot of clear gloss lacquer, than cemented the whole thing to the back of the station using more Titebond and a couple of straight pins for temporary fasteners.
The chimneys were fashioned from some matt-board cut to shape, covered with some hand-drawn brick paper, with tops made from a piece of matt board and a couple bits of dowel (painted terracotta using some decent craft paint). They were each give a blast of clear-gloss spray lacquer (although it didn't dry with much luster).
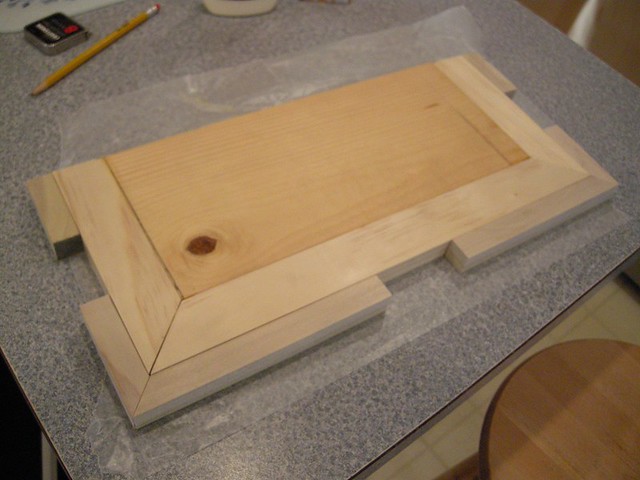
I then moved on to making a base, cobbled together from white pine and poplar scraps found in the shop:
I used 1/4-inch basswood to build up some steps, than gave the whole thing a coat of acrylic model paint (Howard Hues "concrete", no. 1106). For the edges, I printed some gray stone paper on cardstock (from the
Tribute to Tinplate site), gave it a dusting overspray of some light brown, than cut it to length and height and cemented it on. Once dry, I gave the whole thing an overspray of clear satin lacquer:

Stanchions were from my model ship bit box. I had some brass rod I was going to use for railing, but it seemed too malleable (little hands were going to have it all bent up), so I opted for an old favorite, carbon-steel guitar "string". No one's going to bend that, at least not easily. I glued the stanchions in with more GO2, than strung the wire railing. Base done, I wanted to make a little manual station signal for the end of the platform.
The signal is made from a short length of dowel, a sliver of aluminum cut from an old foot-plate for a door, a bicycle spoke cut to length (with a 90-degree bend at the bottom), and a small bolt, nut, and washer to hold the whole thing together. Three holes were drilled in the dowel so that the semaphore could be positioned for stop, slow-down-for-train-orders, or proceed-without-stopping. The inspiration for this came from an old JEP toy signal I have seen. Here are some of the bits I used on an earlier project to make a mock-up:

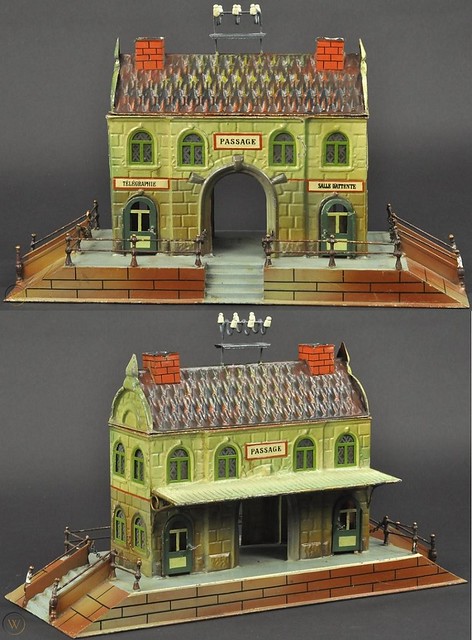
So here's a shot of the original tin Marklin station:
And here's a few shots of my cardboard/paper/wood version:

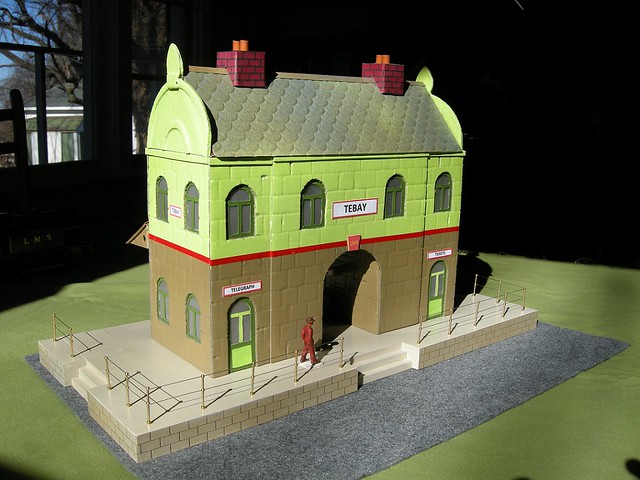

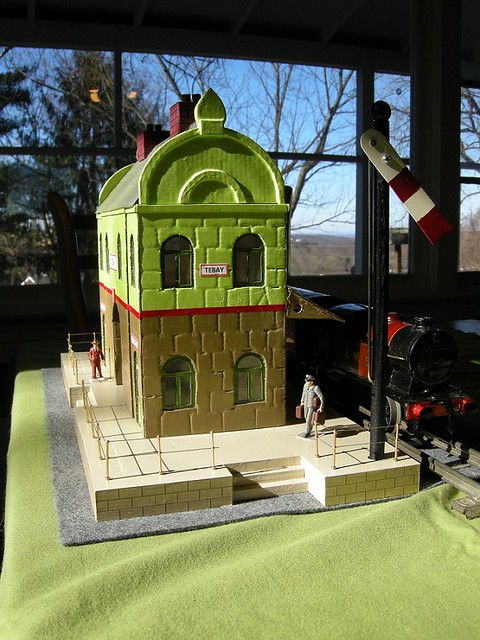
You'll notice I left off that telegraph wire structure at the top of the original, although I have a few repro ceramic insulators that could be used in fabricating on. Maybe later.
That's about it. Took freakin' forever, but it was a fun project for what I hope/pray is the tail-end of Covid. I still need to finish wiring the electrics, the components for which I now have in hand. It should make for a decent addition to the clockwork display planned for next Christmas.


